PRESTO PLANS


Sent straight to your inbox
CLICK HERE TO ACCESS
Sign up to receive 10 ready-to-use ELA resources your students will love!


10 FREE ELA RESOURCES


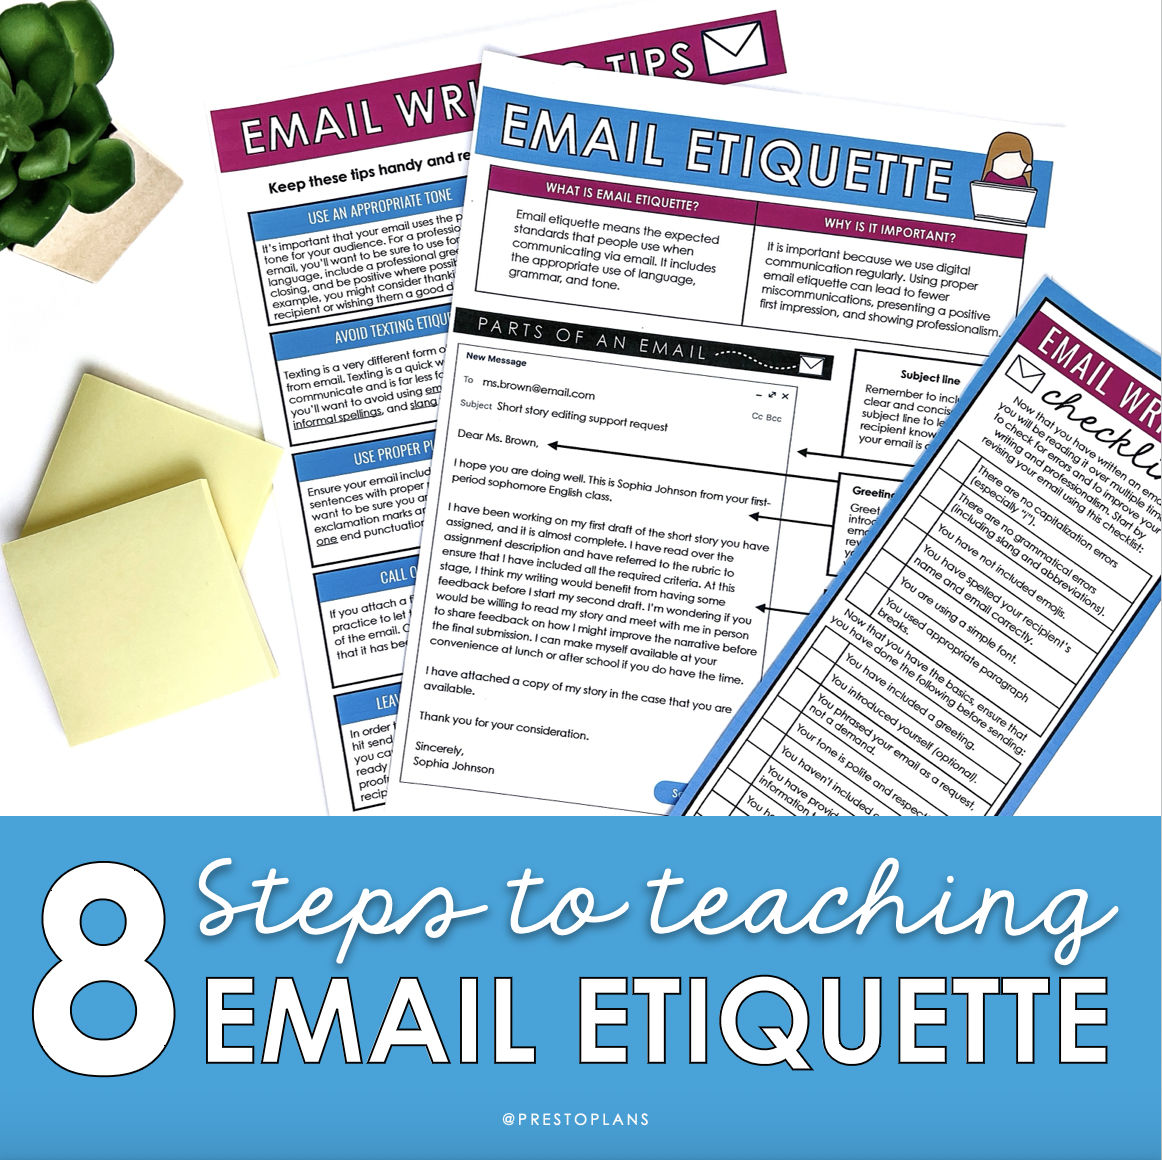
Teaching Email Etiquette in 8 Steps
At the beginning of the school year, I tend to focus my attention on meaningful and practical writing assignments. I find this approach really helps me get an overall sense of who my students are as learners, and as people. This is why I love to kick off the school year by teaching email etiquette!
I believe that learning is most meaningful when it connects to the world outside school. Many middle and high school students haven’t yet mastered the art of sending an email, but they are highly motivated to learn! After all, they know that email etiquette is a skill they will carry with them for the rest of their lives.
Here’s how I approach teaching email etiquette in the middle and high school space – with lots of lessons, engaging activities, practice tasks, and (of course!) a final assignment!
1. Email Etiquette
I like to begin this writing unit by not only explaining what email etiquette is, but why it is important! This can be a great opportunity for students to brainstorm. I ask them how they think learning about email etiquette could help them in their academic or professional lives. Usually, the responses fit into the following themes:
- People tend to use digital communication regularly
- Proper etiquette can lead to fewer miscommunications
- A polite email can create a good first impression
- Email etiquette conveys professionalism
Next, I bring the discussion around to the basic functions of email. Here, I like to present a list of when emails should (and should not!) be used. I explain that emails are the best method of communication when making a non-urgent request, attaching a file or document, or asking for clarification. They can also be used as a tool to check in with a person about scheduled plans or an upcoming meeting.
I also remind students that emails should not be used when information can easily be found elsewhere, or when a matter is truly urgent. Sometimes, it can be fun to do a little role-playing during this part of the lesson! Students could act out situations when sending an email would be inappropriate (for example, when they are feeling angry or upset, or when the recipient is only a few steps away!).

2. Email Mechanics
Before we get into the nitty-gritty of actually composing an email, I find it helpful to review basic email terminology and mechanics. I like to begin the email etiquette lesson with a quick discussion about email addresses and professionalism. Sometimes, I share some funny fictional email addresses (spaghettimonster@email.com) alongside some more serious ones (first.lastname@email.com) to help explain how to choose an appropriate email address.
If time permits, this is also a natural opportunity to talk about how other people may be included in an email, and to explain the To, CC and BCC fields. Depending on what your learning goals are for this lesson, you might also want to spend some time talking about email attachments (photos, PDFs, and other documents), appropriate fonts, and overall notes on style and tone.
The best piece of advice I share with students is to leave the “To” field blank until the email is ready to send. This way, the recipient only sees the email the writer wants them to see (and not one that was mistakenly sent too soon!)
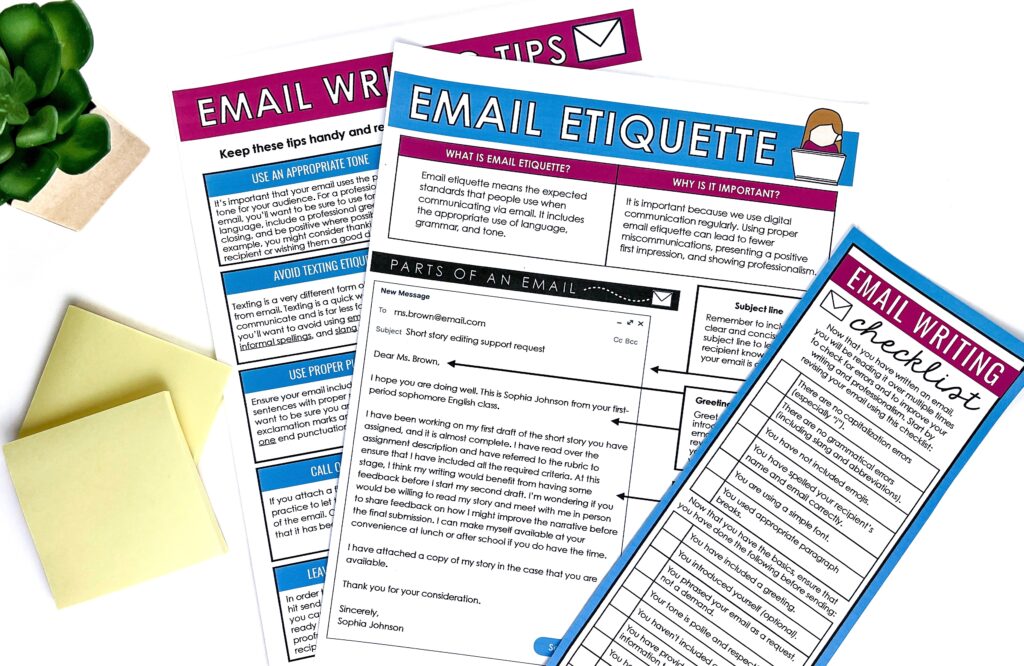
3. Email Anatomy
In this segment of the email etiquette lesson, it’s time to review the “anatomy” of an email! First, I review the greeting. This is another chance to discuss professionalism and tone, and for students to brainstorm their own friendly salutations.
Next, we go over the introduction. I explain that an introduction may or may not be necessary, depending on the context of the email, and whether the recipient knows the sender already!
After the introduction, we move on to the email body itself. Students should understand that this is the “why” of the email – in other words, the purpose of the message itself. I find students tend to benefit from a real-world example, so I like to ask them to imagine they are emailing their teacher. In this example, they might wish to include some specific information, such as:
- Why they are sending the email
- What actions they have already taken to address the issue they are writing about
- Next steps (what they currently need support with or would like their teacher to do)
Finally, the closing provides another opportunity for teaching email etiquette. I find students often enthusiastically brainstorm different ways to “sign off” the email!
To reinforce the different email anatomy sections, the end of the lesson is the perfect time to distribute a handout that summarizes email writing tips, as well as how to create appropriate subject lines.
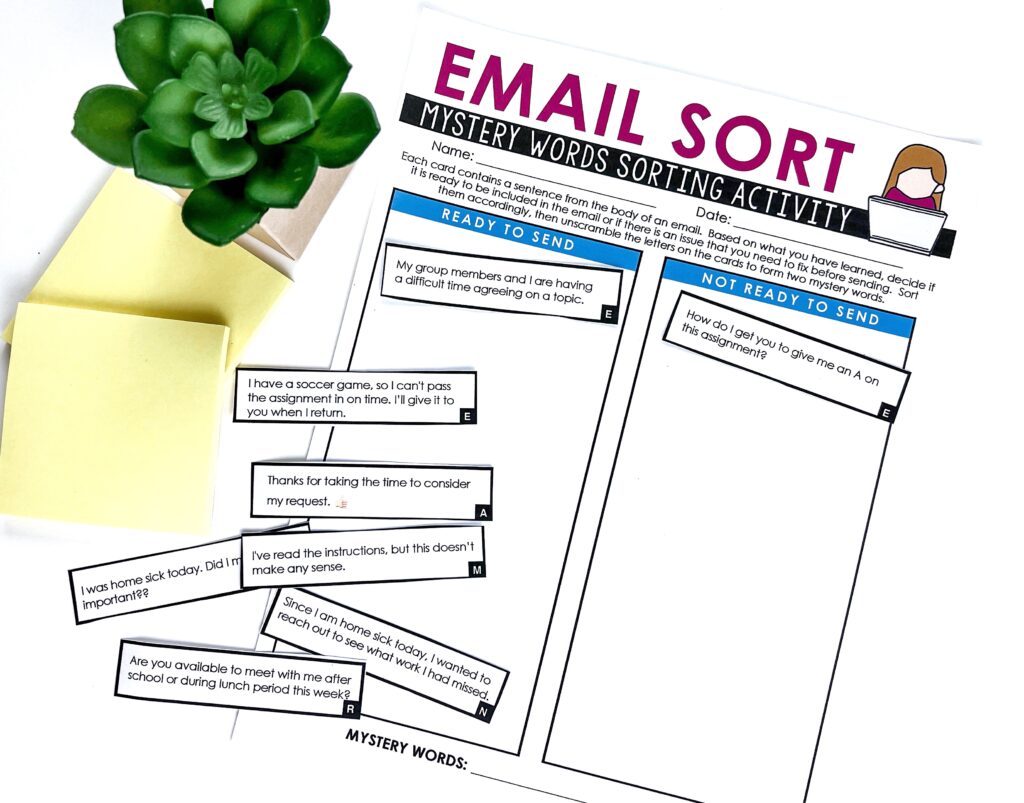
4. Ready to Send vs. Not Ready to Send
After the previous email etiquette lesson, it’s time to get your middle schoolers up and moving! I love using collaborative tasks to reinforce my teaching about email etiquette. These activities allow students to talk through their ideas, and to demonstrate their understanding of tricky concepts, like tone.
Working in pairs or small groups, students refer to two different handouts. One is a graphic organizer, divided into two columns (“Ready to Send” and “Not Ready to Send”). The other contains several examples of sentences from various emails. Students must work together to cut each sentence out and categorize it into the appropriate column.
For an engaging bonus, each of the sentences is also labelled with a capital letter. If the sentences are placed in the correct columns, students should be able to unscramble the letters to reveal two mystery words related to email!
5. Email Editing
Next, I like to engage students an email editing task. The one I use is an interactive activity students can complete alone, or in their pairs or small groups.
To begin, distribute a sample email that contains style and tone errors (as well as some spelling and grammar mistakes, and even an emoji or two!). Using colored pencils or highlighters, students must identify the errors in the message, and then make revisions in the margins of the handout to ensure the email is ready to send!
Once everyone in the class has finished the task, I reveal the errors, as well as comments on the various sections of the email that need to be improved. I sometimes like to use this task as an exit slip or self-check to determine if my students need any further email etiquette review lessons before moving on.

6. Email Analysis
An email analysis activity is another way to incorporate movement while teaching email etiquette! I like to set this learning task up as six numbered stations around my classroom. Students can circulate through the stations in any order they choose, and may work alone or collaboratively on this activity.
First, I print multiple copies of each email and ensure they are in the correct stations. Then, I give each student (or group, if they are working together) a graphic organizer, where they can track their thoughts on each email. From here, they can evaluate whether the email is ready to send, and offer their own suggestions for improvements that can be made.

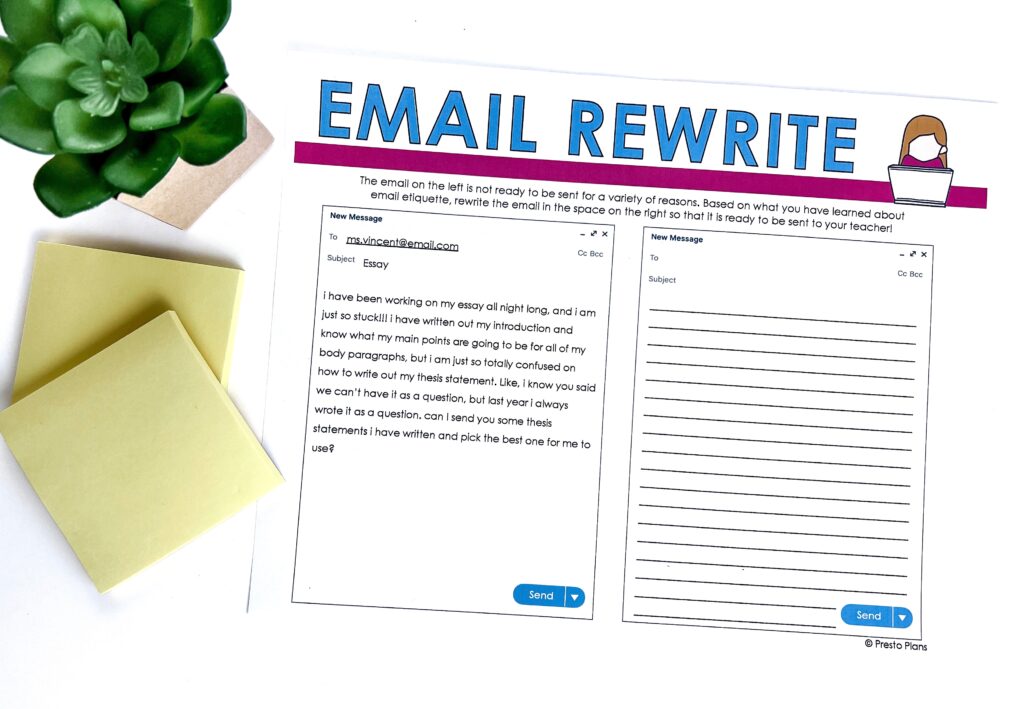
7. Email Rewrite
I find an email rewrite task really helps students who get “stuck” with writing tasks. For this email etiquette lesson, I prefer that students work independently (so I can check on their progress and overall understanding).
Start by distributing a pre-written email from a student to a teacher – in the example I use, the tone is far too casual! Once my class has identified the main issues with the email (tone, word choice, and capitalization, and grammar errors), I invite them to rewrite the email more effectively. This can be the push some students need to really demonstrate understanding of email etiquette!
8. Email Writing Assignment
Finally, students can show off what they know by writing their own email. This final writing task can be approached in a few different ways.
If it’s the beginning of the school year and I don’t know my students very well yet, sometimes I give them the task of sending me an email to provide specific information about themselves as learners. This is also a great opportunity for them to ask any questions about ELA class.
Alternatively, I provide students with a selection of topic prompts. These can be presented in a variety of ways. Students could draw prompts out of a hat, choose them from a list, or receive one at random! They can refer back to their email writing checklist as they put their email etiquette lessons to the test!

There you go! I hope you have a great time teaching email etiquette in your classroom, and that your students have fun putting their learning into practice!
Looking for more great back-to-school activities? Check out my post on 5 Back to School Essentials for Middle School ELA.


Search the blog for what you are teaching


GIVEAWAYS
sent straight to your inbox!


share this post